Origami Dripper: How to Use It and Brew an Incredible Coffee
You bought the Origami Dripper, thought it looked beautiful on the shelf, and now you’re not quite sure where to start? This Japanese pour-over, created by Yasuo Suzuki, is one of the most versatile out there, but also one of the most confusing. It accepts two types of filter, and each one calls for a different recipe. Here’s the complete guide to help you extract an incredible cup without guessing anything.
What makes the Origami different
The first thing that catches your eye are the 20 ridges on the inner walls, those vertical folds that give the dripper its name. They keep the paper filter away from the wall, creating small air channels that help water circulation. The internal angle is 60 degrees, similar to the Hario V60.
The other important detail is the large drainage hole at the bottom, much bigger than the V60’s or the original Kalita Wave’s. This means less resistance for the water to flow through, so the coffee tends to drain faster if you don’t adjust the grind.
There are two size versions: the S, for 1 to 2 cups (compatible with V60 01 and Kalita Wave 155 filters), and the M, for 2 to 4 cups (compatible with V60 02 and Kalita Wave 185 filters).
Ceramic or resin: which one to choose
The Origami comes in Japanese porcelain (Mino ceramic) and in acrylic resin, the latter sold as “Origami Air.” The material you choose changes the thermal behavior of the brew.
- Ceramic: it’s heavy and absorbs a lot of heat from the water at the start of the brew, which can drop the temperature of the mixture (the slurry, the technical name for the coffee-and-water mix inside the filter) by as much as 5 °C to 10 °C if you don’t preheat it properly.
- Acrylic resin: it’s lightweight, cheaper, and insulates heat better, meaning it steals less temperature from the water during extraction.
If you don’t have the patience to carefully preheat it every time, the resin version is the safer choice for everyday use.
One detail that’s easy to miss: the Origami doesn’t come with its own base or handle. It needs a separate holder, in wood or resin, fitted onto the carafe. If that holder leaves the dripper tilted, one side of the coffee bed gets more water than the other, and the result comes out uneven.
Conical filter or Kalita Wave: the choice that changes everything
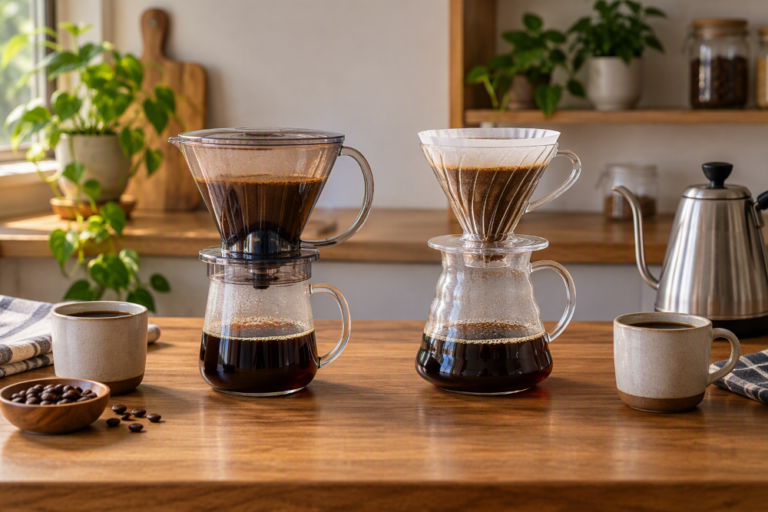
This is the real trick of the Origami: it accepts both filter shapes, and each one delivers a different coffee.
- Conical filter (V60-type): creates a deeper coffee bed. It highlights bright acidity, more flavor clarity, and floral or fruity notes, with a light to medium body.
- Kalita Wave filter (flat bottom): keeps the water in contact with the grounds longer in the ridges at the bottom. It leans toward sweetness, caramel notes, and a more velvety body.
Watch out for this common mistake: if you switch from the conical filter to the Kalita Wave and keep the same grind size, the coffee comes out weak and flat. The reason is that the Origami’s wide hole already drains fast, and the flat-bottom filter removes the extra resistance that was missing. The fix is simple: grind finer when using the flat-bottom filter in the Origami.
Recipe to start with: Kalita Wave filter, focused on sweetness
This recipe is based on a technique used by the Kurasu roastery, from Kyoto, and it’s a great entry point.
- Coffee: 15 g, medium-fine grind (slightly finer than for the V60)
- Water: 250 g at 93 °C (ratio of 1 to 16.6)
- Bloom: pour 40 g of water, without stirring with a spoon, and wait 40 seconds.
- First pour: keep pouring until you reach 150 g, over about 10 seconds.
- Second pour: at the 60-second mark, top up to 250 g, also in a continuous pour.
- Time cutoff: at 1min30, remove the dripper from the carafe, even if it’s still draining. This cutoff avoids pulling the bitter compounds from the end of the extraction.
Recipe for the conical filter: more body and complexity
This version, inspired by a recipe from the Stumptown roastery, works well with the V60 filter inside the Origami.
- Coffee: 21 g, medium-fine grind (texture of sea salt)
- Water: 340 g, just off the boil (ratio of 1 to 16.2)
- Bloom: pour 50 g of water and stir well with a spoon to wet all the dry grounds.
- At 45 seconds: pour in a spiral up to 200 g.
- At 1min30: pour up to 280 g.
- At 2min: final pour up to 340 g, passing along the edges to “wash” the grounds stuck to the filter wall.
- Total drawdown time: between 3 and 3min15.
Origami vs. Hario V60: is there a real difference in flavor?
Lab tests with a refractometer (a device that measures coffee strength, or TDS, the percentage of dissolved solids in the drink) used 15 g of coffee to 230 ml of water in both drippers, with identical grind and temperature. The result was quite similar: the Origami came out with a TDS of 1.38% and an extraction yield (how much of the grounds actually turned into flavor in the cup) of 17.25%, against 1.37% and 17.00% for the V60, essentially tied.
The real difference shows up more in the filter you choose than in the dripper itself. If you want acidic and floral notes, use the conical. If you prefer sweetness and body, go with the Kalita Wave.
Common mistakes and how to fix them
- Weak, watery coffee with the flat-bottom filter: grind finer to make up for the Origami’s wide hole.
- Harsh acidity and no sweetness with the ceramic version: preheat the dripper thoroughly with boiling water before adding the grounds.
- One side more bitter, the other weaker: check that the dripper isn’t tilted on its holder before you start pouring.
- Flow stalls at the end and the coffee turns harsh: you stirred too much with the spoon or poured from too high up. This pushes the fines (tiny coffee particles) down to the bottom and clogs the filter. Always pour in a gentle spiral, with the kettle spout close to the grounds.
How to test it at home
Pick one filter to start with, preferably the Kalita Wave, which is more forgiving. Then:
- Follow the recipe exactly from start to finish, without skipping steps.
- Note the total time and taste carefully.
- Coffee weak or acidic? Grind finer next time.
- Coffee bitter or harsh? Grind coarser or reduce the agitation.
- Always change one variable at a time so you know what actually made the difference.
A grinder with well-adjusted burrs, the pieces that cut the bean evenly instead of crushing it, makes all the difference in this fine-tuning process.
Quick tips
- Rinse the filter well before use, to seal the paper against the walls and remove the papery taste.
- Stir the dry grounds with a spoon before pouring the water, to even out the coffee bed.
- Use coffee roasted less than 30 days ago.
- If it’s ceramic, preheat it generously before every brew.
Frequently asked questions
Can I use any paper filter in the Origami?
No. Use the filters made for the shape you choose: V60-type conical (or Cafec) for the acidic, floral mode, or Kalita Wave 155/185 for the sweet, velvety mode, always in the size that matches your Origami (S or M).
Is the Origami good for someone just starting out in specialty coffee?
Yes, especially with the Kalita Wave filter, which forgives pouring mistakes more easily. Once you’ve gained some practice, the conical filter opens up a whole new range of flavors to explore.
Is it worth buying the Origami if I already have a V60?
It is, if you like varying your coffee’s flavor profile. The Origami works like “two drippers in one,” since it accepts both filter types. Someone with only a V60 is limited to the more acidic, brighter profile.
Your next cup in the Origami
Choose the filter based on the flavor profile you’re after, follow the recipe closely the first time, and adjust the grind afterward. After a few tries, you’ll understand how your Origami behaves, and you’ll have gained a dripper that changes personality depending on what mood you’re in.
Keep exploring